The Complete Guide to Infrared Film Photography — From Kodak Aerochrome to Rollei Infrared 400
TK Broecker / 17 May 2026
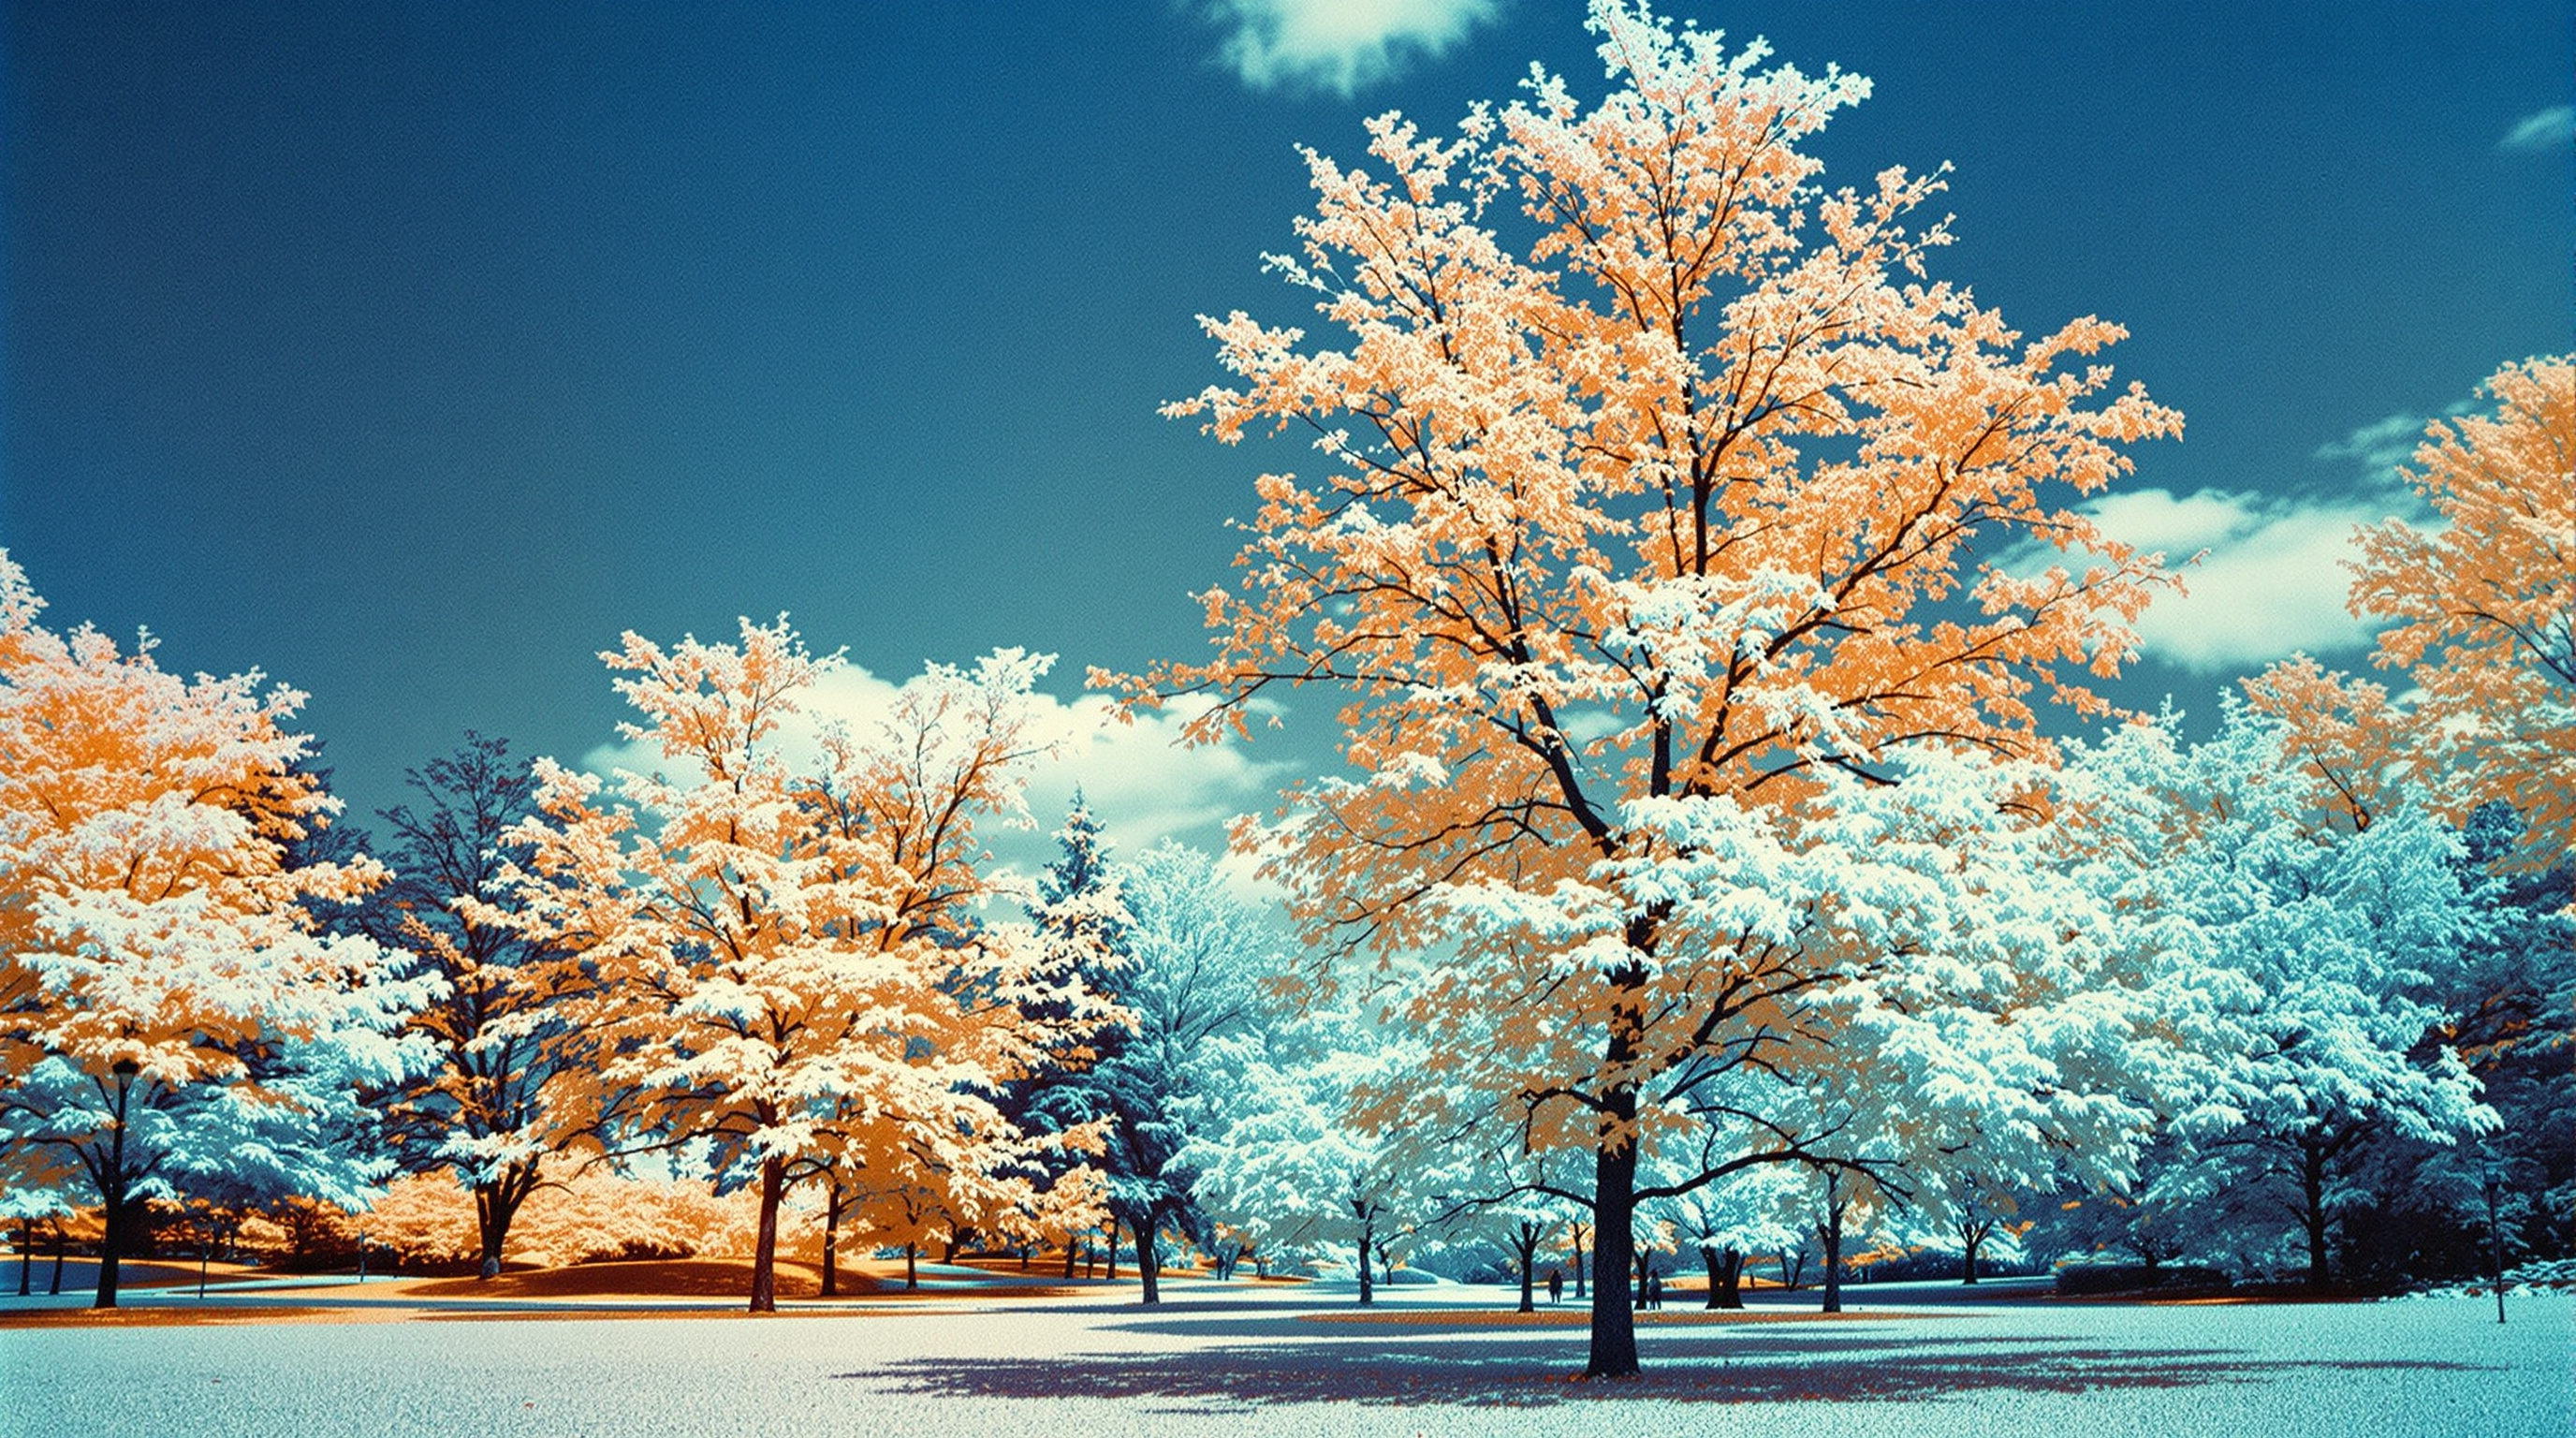
Infrared film photography occupies a unique and almost magical corner of the analog world. By capturing light beyond the visible spectrum — typically wavelengths above 700 nanometers — infrared film renders familiar scenes in ways that feel alien, ethereal, and deeply artistic. Whether you're drawn to the false-color dreamscapes of Kodak Aerochrome or the classic black-and-white glow of Rollei Infrared 400, this guide will walk you through everything you need to know to shoot and develop infrared film successfully, including tips specific to shooting in and around Louisville, Kentucky.
Understanding Infrared Film — What Makes It Different
Standard photographic film is sensitive to visible light, roughly from 400 to 700 nanometers. Infrared film extends this sensitivity into the near-infrared range (700–900 nm), and depending on the emulsion, can respond to infrared radiation in dramatically different ways.
There are two broad categories of infrared film:
- Black-and-white infrared film (e.g., Rollei Infrared 400, Ilford SFX 200, Kodak HIE): These films render infrared-reflective subjects — most notably green foliage and skin — as brilliantly bright whites, while blue skies go nearly black when shot with a red or opaque filter. The result is a high-contrast, otherworldly monochrome image.
- False-color infrared film (e.g., Kodak Aerochrome III 1443): Originally designed for aerial surveillance and vegetation analysis, Aerochrome maps infrared light into the red channel, shifting the entire color palette. Green foliage becomes vivid magenta or red, skies turn cyan or deep blue, and skin takes on golden or yellow hues.
Kodak Aerochrome, now discontinued as a regular commercial product, was a color reversal (slide) film designed for aerial reconnaissance. Its use in artistic photography was famously popularized by musicians like Jimmy Buffett and more recently by filmmaker Richard Mosse, whose project Infra documented conflict in the Democratic Republic of Congo using Aerochrome to stunning and haunting effect. Because Aerochrome is no longer in production, existing rolls are expensive, often expired, and require careful refrigerated storage. Shooting it is a commitment — but the results are unlike anything else in photography.
Rollei Infrared 400, on the other hand, is actively manufactured and far more accessible. It is a panchromatic black-and-white film with extended infrared sensitivity up to approximately 820 nm. It can be shot at box speed (ISO 400) without a filter for a more subtle effect, or pushed and combined with a deep red (R25A) or opaque infrared (R72) filter for maximum infrared rendition.
Essential Tips for Shooting Infrared Film
Shooting infrared film successfully requires some adjustments to your usual photographic workflow. Here are the most important considerations:
- Use the right filter. For black-and-white infrared films like Rollei Infrared 400, a Hoya R72 or Wratten 89B opaque infrared filter will block visible light and allow only infrared wavelengths through, maximizing the infrared effect. A Wratten 25 red filter gives a less dramatic but still striking result. For Aerochrome, no filter is required for the false-color effect — in fact, a Wratten 12 (minus-blue) yellow filter is typically recommended to cut UV haze in aerial work, and this practice carries over to artistic shooting.
- Expose generously. Infrared films, especially when used with opaque filters, require significantly more exposure than the box ISO suggests. With the R72 filter on Rollei 400, many photographers rate the film at ISO 6 to ISO 25. Bracket exposures liberally, especially early in your experiments.
- Focus compensation matters. Infrared light focuses at a slightly different plane than visible light. Many older lenses have a small infrared focus mark (a red dot or line on the focus scale) — use it. With modern autofocus lenses on film SLRs, this is less of a concern but can still introduce slight softness. Stopping down to f/8 or f/11 increases depth of field and mitigates focus shift.
- Load and unload in complete darkness. Infrared-sensitive films — particularly Kodak HIE and Aerochrome — can fog if loaded under bright light. A changing bag is strongly recommended. Rollei Infrared 400 is less sensitive in this regard but still benefits from shade during loading.
- Shoot in bright sunlight. Infrared photography thrives under strong, direct sunlight, which is rich in infrared radiation. Overcast light produces a much weaker infrared effect. Midday sun in summer — when solar elevation is highest — produces the most dramatic results.
- Choose your subjects carefully. Green deciduous vegetation is the most infrared-reflective natural subject, producing the characteristic white glow. Coniferous trees reflect less infrared. Water and clear sky absorb infrared and render very dark.
Developing Rollei Infrared 400 — A Practical Walkthrough
One of the great advantages of Rollei Infrared 400 is that it can be developed in virtually any standard black-and-white developer. It behaves much like a conventional panchromatic film, though its extended spectral sensitivity means you should handle it in complete darkness during loading onto the developing reel — do not use an orange or red safelight.
Recommended developers and starting times include:
- Kodak D-76 (1:1) at 20°C: approximately 11–13 minutes — a classic choice that delivers full tonal range and moderate grain.
- Ilford ID-11 (stock) at 20°C: approximately 9–10 minutes — similar to D-76 in character, widely available.
- Rodinal (1:50) at 20°C: approximately 13–15 minutes — produces higher acutance and more pronounced grain, which many photographers find suits the gritty aesthetic of infrared work.
- Ilfosol 3 (1:9) at 20°C: approximately 7.5 minutes — a good option if you want a fine-grain result with good shadow detail.
If you are pushing Rollei Infrared 400 to ISO 800 or higher (useful in lower light or when using very dense filters), extend development time by approximately 25–30% per stop, and expect increased grain and contrast — which can be aesthetically desirable in infrared work.
For Kodak Aerochrome, development is considerably more complex. It is a color reversal (E-6 process) film, meaning it must be processed in E-6 chemistry — not C-41. Because it is no longer in mainstream production, very few labs process it routinely. Cross-processing Aerochrome in C-41 is possible and produces its own unique color shifts, but results are unpredictable. If you can find a specialist analog lab willing to run E-6, that is the preferred path for true-to-design results.
Shooting Infrared Film in Louisville, Kentucky
Louisville offers a surprisingly rich variety of locations that lend themselves beautifully to infrared photography. The city's blend of lush green spaces, historic architecture, and the dramatic Ohio River waterfront creates conditions ideal for exploring infrared's visual language.
Some standout locations include:
- Cherokee Park — Designed by Frederick Law Olmsted (the same landscape architect behind Central Park in New York), Cherokee Park features dense deciduous woodland, open meadows, and scenic drives. In summer, the tree canopy practically glows under infrared illumination. The Hogan's Fountain area and the formal garden sections are particularly photogenic.
- Cave Hill Cemetery — One of the great Victorian garden cemeteries of America, Cave Hill is both a burial ground and an arboretum. Its mature oaks, maples, and weeping willows, combined with the ornate 19th-century monuments, create a moody and deeply atmospheric setting for infrared work.
- The Ohio Riverfront and Waterfront Park — The wide expanse of the Ohio River provides dramatic dark water contrasts against infrared-bright sky and shoreline vegetation. Early morning or late morning — before midday haze builds — offers the best light.
- The Highlands neighborhood and Bardstown Road — Leafy residential streets lined with bungalows and Victorian homes, overhung with mature street trees, translate gorgeously into infrared black-and-white, with glowing canopies framing architectural details.
For film processing in Louisville, the local analog photography community has grown in recent years. Several labs in the Louisville area and the broader Kentucky region offer black-and-white film processing services. For more specialist needs — particularly E-6 processing for Aerochrome — photographers in Louisville typically ship to dedicated analog labs such as Dwayne's Photo in Kansas or specialist film labs on the East and West Coast. It is always worth checking current local offerings, as the film photography revival has prompted the opening of new labs across the country.
Conclusion
Infrared film photography rewards patience, experimentation, and a willingness to see the world differently. Whether you are lured by the surreal false-color palette of Kodak Aerochrome or the luminous monochrome glow of Rollei Infrared 400, the process demands attention to light, exposure, and development in ways that deepen your understanding of photography itself. For those in Louisville, the city's green parks and historic streets offer an ideal playground for infrared exploration. Load your camera, stop down, and let the invisible light in.